Monday, February 24, 2014

TpT SALE and an Eagle Update!!!!!!!!!!!

300 × 250

Start working on your wishlist, ladies.  Teachers Pay Teachers is getting ready for a big sale this week!  Here is a great opportunity to grab some incredible teaching materials at such amazing prices.  
I've readied my store for a whopping 20% off everything.  Use the promo code TPT3 to get another 8% off.

Here are a few of my best sellers.
Officer Buckle and Gloria - Mini-Unit - UPDATED!

Thanksgiving on Thursday - A Unit Civil War on Sunday - A Unit
(FYI:  I am currently working on another Magic Tree House Book.  "Revolutionary War on Wednesday" should be out within the next month.  After that I'm moving on to "Mummies in the Morning" and "Dinosaurs Before Dark"!)  
Multiplication Tricks Posters 

Snowmen at Night - Mini-Unit


And here is my Decorah Eagle Unit.  I recently did a post on these beauties.  You can read about it here
Decorah Eagle Unit
By the way!  As of February 23rd, the Decorah eagles have laid their first EGG of the season.  Now begins the countdown to hatching.  In years past, the pair have had 2-3 eaglets.  Incubation takes 35 days.  So by March 30th we should be seeing signs of hatching.

Head over to UStream TV to watch these eagles, then check out my unit.

So click on the sale banner above to check out all the great materials at TpT.  Or click on the Shop button on the right or on any of the product images to head straight to my TpT store.

~Stacy


Tuesday, February 18, 2014

A {Belated} President's Day Activity

Well, I guess it was a good thing we had President's Day off of school because here in Illinois it would've been ANOTHER snow day!  Yes, 5 more inches fell upon us yesterday.  And there were even reports of snow thunder.  

Since we had the day off for more than just snow or extreme temperatures, I wanted to make sure the kids understood why they got to sleep in and play on the wii all day.  

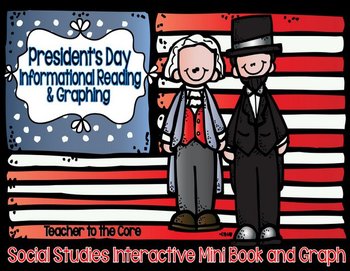
I started out with this uber-cute FREEBIE by Teacher to the Core.  The kids make a mini book that teaches them more about the two presidents: Washington and Lincoln.  (Click on the image below to go to her store to get your own copy)
Presidents' Day Mini-book and Graph Freebie


The book is packed with simple facts about the former presidents.

And, lucky us, we just started money today and there was a great correlation!

In addition to the mini-book by Teacher to the Core, I also pulled out my President's Day Cootie Catcher.  My kiddos love working with cootie catchers.  It's taken a few practices but they're beginning to learn how to fold the paper just right.  

The catcher has more facts about the presidents and they need to lift the flap to see if their answer is correct.

In honor of these two great presidents, I will be selling my President's Day Cootie Catcher at my TpT store at a reduced price.  Regularly priced at $1.75, now only $1!  Click on the image below to go to my store.
Available for this week only!


To bring all this together, I will be having my students write what they learned about each of the presidents. 
The students are asked to include important information like: name, number president, the years served in office, what currency they are featured on, etc.  They must also include a few other facts that they learned about their president that they didn't already know.  For example, George Washington never lived in the White House.  (Because it hadn't been built yet!) 

 Above is the great peek-over craft we make to hang with the writing.  For your own copy of patterns, click on the pictures above.  I'll do a follow-up post after my students have finished their writings.

~Stacy 


Saturday, February 15, 2014

Money Madness {Part Two} and a {Freebie}

Of all my money skills games, this one is my favorite!  
This game is called "Trading Up".  This post is a continuance from a previous post with other great freebies.  You can check that one out here.


I discovered this awesome resource while cruising a site called Math Wire.  Among their other great teaching aids, this game is essential, in my opinion, for teaching money.  Did I mention it's completely free?!?!?
The original actually looks like this:  (click on the image to get your own copy.)


But I made a few tweaks to it so that the students would get more from it.  Here's my version.  Click on it for a copy.


The first thing I changed was including a nickel slot in the dimes section.  I know it might confuse the kids if there is a nickel sitting in the dimes section, but I really needed my classes to start thinking that a quarter can also be two dimes and a nickel.  Besides, how are they supposed to trade up two dimes for a quarter?


The second thing I tweaked was the addition of a half-dollar section.  Though half-dollars aren't part of the core, I still feel they should be included.  Not only that, but it helps to reinforce that 50 is half of 100.


The spinner came from the resource book from our old math series, but you can easily create your own.  Or you can have your kiddos roll a dice or draw cards out of a bag.  
The amounts are: 1¢, 2¢, 5¢, 6¢, 8¢, 11¢, and 13¢.

Materials needed for play: a Trading Up work mat, a spinner, and a baggie of coins.  (Note: the work mats in these pictures do not include the mentioned "new" half-dollar section. These are the older ones and I plan on replacing them soon.)

Here's how you play.  The student spins the spinner and finds the coins needed to make the amount spun.  Then, they place the coins in the correct spaces on the work mat.  For example, if they spun 11¢, they dig out a dime and a penny and place those on the mat.  The dime fills a "dime" slot and a penny fills a "penny" slot.  You get the idea.  With each spin, they begin to fill up slots.  Once all the slots are filled in any certain section, the student needs to "Trade Up".  
If they have all five penny slots filled, they can trade those for a nickel. Two nickels for a dime, two dimes and a nickel for a quarter, and so on.
The game continues until they have traded up to a dollar.  The first to a dollar wins!


Every so often, I call "Stop Action", which is a signal to immediately stop play and place hands flat on the desk.  I learned this little trick from John and Jane Felling at Boxcars and One-Eyed Jacks.  It is brilliant and works like a charm.  I get instant attention from the whole class.  And we all know how hard that is, especially when the kiddos are playing with manipulatives, don't we?

Anyway...... When I call stop action, I have the students count up the money they've accumulated on their work mats and whisper the amount to their partner.  Then, to assure accountability, I meander around and ask students to whisper it to me.

~Stacy


Wednesday, February 12, 2014

Valentine's Mail Bags

Growing up, we always made our own mailboxes for Valentine's Day.  Each year my boxes became more and more elaborate as my mother dreamed up more creative ways to decorate a tissue box. (Or oatmeal box, or cereal box, or shoe box!)  I was always excited to see what everyone else came up with, too!

I've tried do this very thing in my own classroom but to little success.  Over the years the parents have just been too busy or too unsure of their creativity to make it work.  So the mailboxes in my classroom have evolved to a simple, white lunch sack.  But I couldn't just leave it at that.  Oh, No!!!!!   

First, I wanted to write each student's name on the bag but my handwriting is neither neat, nor cute.  So I remembered a pin on Pinterest where you can print on paper sacks using your printer.  Since I had already learned how to print on post-its, I knew the paper bag would be just as simple.  With only one jam, (and the smell of a very hot printer, whoops!) I was able to print out bags for all of my students.  Find out how to print on paper bags here.

Then I cut out dozens of different-sized red, pink, and purple hearts.  Of course, you could have your students do this step, but I've learned they turn out much better if I do the cutting.  


Then I set them loose. . .


We finished them off with a pretty little doily.

Aren't they SWEET!!!!!

Happy Valentine's Day!
~Stacy

Tuesday, February 4, 2014

Money Madness! {Freebie!}

Money, money money! It's crunch time ladies!  According to CCSS, 2nd graders are expected to master time and money.  So that means we will be eating, sleeping, and speaking time and money for the next several weeks.  We're still finishing up a chapter on 3-digit addition and subtraction, but since my kids just FLY through those lessons, I thought I'd use the extra time to get money rolling. 

Right now we are only working with dimes, nickels, and pennies.  But all of these activities can be adapted to use quarters.  (Half-dollars are not included in the core but I'm sure they can be integrated somewhere!)  
These activities are great for time-fillers but would also be perfect for math centers.  I have the worksheets in plastic sheet protectors (trying to save a few trees!) but you could just ask easily laminate the pages and dry erase works just as well.

Money Grab Bag
Here the student has a mesh baggie with nine coins: 3 dimes, 3 nickels, and 3 pennies.  She pulls three random coins out of the bag, records each coin from largest to smallest.  Then she counts the coins and writes the total amount on the line.  Easy-peasy!  Later, I can just toss in 3 quarters and the activity goes to a whole new level!

For this activity, you need a worksheet and a set of coins:  3 dimes, 3 nickels, and 3 pennies.

Click on the image to get this freebie.

Nickel Strike-Out
Here the students are working with just nickels.  Most of our coins are divisible by five.  That means we can skip count by fives to count money.  This activity makes the students think of 25 cents as 5 nickels, or 10 cents as 2 nickels.  To play, the student rolls a money die, writes the amount on the line.  Then counts out enough nickels to show that amount and write how many nickels it took.  Since the 1 cent doesn't work so well, I made those the "Strikes".  If they roll a 1 cent, they get a strike, three strikes, you're out!

These money dice were hand-me-downs so I'm not sure where they came from.  The six sides have 1 cent, 5 cent, 10 cent, 25 cent, 50 cent, and $.  If you can't get your hands on a set of dice like this, you can easily make them or have the students draw cards out of a bag.

For this activity, you need the worksheet, several nickels, and one money dice.

Click on the image to get this freebie.


Money Match-Up
Here the group is taking a given money amount and showing it using dimes, nickels and pennies.  The student just draws a money card from the stack, writes it on the line and then uses coins from the mesh bag to show that amount.  Right now, the card only go up to 30 cents.  As we get further into money, I'll toss in the higher card amounts.  


 For this activity, you need the worksheet, a set of coins, and the money cards.  

 The money cards were leftover from an old calendar set.  I couldn't bring myself to toss these.  You can very easily make your own set for this.

Click on the image to get this freebie.

Pay the Bank
Not only does this get the kiddos working with money, it also reinforces place value.  The student rolls a dice and counts that many pennies out onto their ten frame.  With each turn they should fill up the frame.  Once it's full, they trade the ten pennies for a dime.  The first student to earn 5 dimes wins!


For this activity, you will need a ten frame, a dice, several dimes and pennies.

BTW..... the mesh bags that I keep (most) of my small manipulatives in came from Boxcars and One-Eyed Jacks.  They are perfect for small things like coins and dice.  The baggies also make disinfection super-simple.  Just toss your bags (manipulatives and all!) into the wash with a touch of detergent and bleach and the germs wave bye-bye!


The sheet protectors came from C-Line.  You can get a set of 10 for $23.  I know, that sounds high but these babies can sure take a beating!  Click on the picture to take you to the C-Line site.Reusable Dry Erase Pockets, Assorted, 9 x 12, 10/PK, 40810
Enjoy the latest weather, friends!

~Stacy